| RESTORATION PAINT AND RUST REMOVAL ON THIS 1963 CHEVY TRUCK |
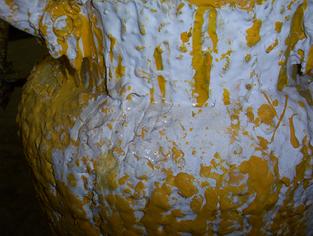
The pictures above are of a 1963 Chevy truck cab in various states of stripping. The before pictures show the project after the thermal process was completed. The white and pink areas are fly-ash. The dark colored patches are places where no coatings were present before the bake. As a result of no protective coatings to prevent weathering, these areas were exceptionally rusted. The cab body was then blasted with the parameters listed below to remove all fly-ash, corrosion and discoloration. The sheet metal has been cleaned to a grade A, white metal finish and is now ready for primer. Many different medias can be used when stripping these projects. Had a thermal cycle not been possible or practical, another material would have been selected. No one specific method should ever be applied to every antique restoration project. Objectives will vary widely with vehicle make and model and state of condition, but this worked well on this classic automobile. In any event, a flat matte, etched surface will provide the best adhesion and reduce the possibility of a future coating failure. - 40 psi regulated pressure
- 5/16 double venturi nozzle
- 120/240 reclaimed BLACK MAGNUM abrasive
This project was completed on Jan. 29, 2003. Total process time was 10 shop hours. Total cost was $484.00 including thermal processing.
|
| THICK COATING REMOVAL WITH BLACK MAGNUM ABRASIVE |
These line marking machines are a yearly project for our company. We sandblast 5 to 9 machines per year with 12/40 Black Magnum. The increased aggressive attributes of a 12/40 coal slag gave us a quick clean cut on these heavily coated tanks. Because of rubber hoses, tires, and compressor units still mounted to the frame, a thermal process was not an option. Please note the increase surface texture of the second tank.
|
 |
| LINE MARKING MACHINE |
|
|
 |
| LINE MARKING MACHINE |
|
|
| BLACK WALNUT SHELL GRIT BLASTING REPLACES SODA BLASTING AND PLASTIC MEDIA BLASTING FOR MOST APPLICATIONS |
| This steel guard was stripped with nonabrasive black walnut shells. Paint has been removed without base metal removal or etching the substrate. The discoloration visible around the weld cannot be removed with walnut shell blasting and causes the grade of surface preparation to be less than white metal. In this case we give it a grade C. This panel will not exhibit good adhesion qualities unless it is further abraded via grit blasting or d/a sanding to dull the gloss and remove weld discoloration.
|
|
The aluminum casting to the right was stripped via walnut shell grit blasting. If it is important not to remove any metal, then walnut shell is an excellent choice. What's the difference between walnut shell, plastic, and soda? Primarily price of material. All will produce an almost identical finish. Walnut shell and plastic share similar density and hardness but, walnut shell is biodegradable, renewable, and about 1/4 the cost of plastic. Soda blasting is not usually desirable unless water solubility is a requirement and the primary determinate factor in what material should be used. It should also be noted that soda is a single pass abrasive and cannot be reclaimed and reused like walnut shell, plastic and other abrasives. As was the case in the afore mentioned steel panel, the substrate produced is currently less than white metal. The grade is a solid B, as the casting is more flat in matte than the steel panel and has less discoloration.
|
 |
| ALUMINUM CLUTCH HOUSING |
|
|
 |
| ALUMINUM CLUTCH HOUSING |
|
|
| CLEAN PAINT HOOKS AND RACKS WITH BURNING AND BLASTING TO REDUCE REWORK |
| The paint hooks to the left were from a local powdercoater. The top left picture shows the hooks after the thermal process has turned the paint into fly-ash. This fly-ash can then be removed by power washing or knocking them off (left center), but that doesn't always remove enough ash to prevent flaking during use. By thoroughly removing all foreign material, no chance of dirt falling onto painted surfaces can occur, and reworking parts can be avoided. The lower left picture shows the best way to prevent rework; clean tooling.
|
|
|
| STAINLESS STEEL SURFACE FINISHING WITH GLASS BEAD BLASTING |
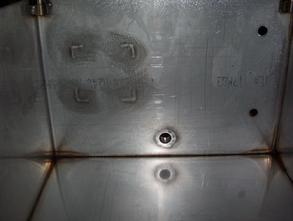
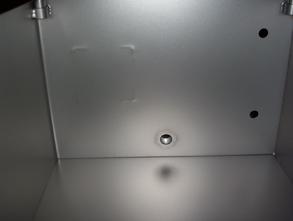
The stainless steel tank top right shows sanding and grinding marks, discolored weld seams, scratches and original mill markings. The unit was surface finished with glass bead blasting. In this, instance we used 70/100 (#8) glass bead at 55 psi. Lower right is the end result. You may view more pictures of glass bead stripping and surface finishing on page two. Dont' stop now, the next page is impressive and we give a few secrets away that will greatly improve quality, reduce process cycle times and save your company money whether customer or competitor.
|
 |
| STAINLESS STEEL TANK BEFORE GLASS BEAD FINISHING |
|
|
 |
| STAINLESS STEEL TANK AFTER GLASS BEAD FINISHING |
|
|
|